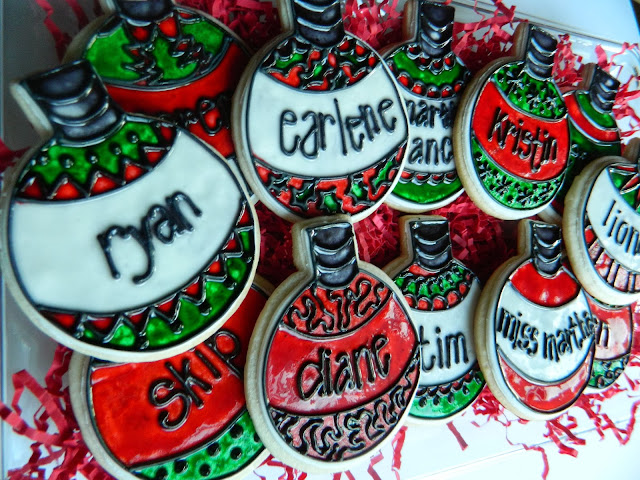
I received quite a few requests to please explain the technique I used to achieve a stained glass effect on a cookie, so to be nice I decided that I would do that for you all.
It is almost Christmas after all.
Remember though, it is NOT my intention to ever become a tutorial writer. I don't mind sharing here and there, but there are already awesome cookie artists out there that cover pretty much anything you could ever want.
I learned cookie artistry by researching techniques and mastering them. I don't mean to sound crass, but seriously, do your own research. Play around with different techniques and never feel limited to only cookie icing be it glaze or Royal.
Be adventurous and use BOTH.
Anyway, last Easter I made these cookies and I was thrilled with the way they came out. I had seen the technique used by Corriecakes and I knew I had to figure out how it was done.
So I did.
I was hoping that I would get to make them this holiday season and my prayers were answered.

This technique is super easy and works up quickly. First off, roll, cut, and bake your shapes.
Go wild and use whatever shape your heart desires.
Make some marshmallow fondant. Flavor it with something crazy like bubble gum. You can use commercial fondant, but just know that crap is nasty. Just stop being lazy and learn how to make your own.
Roll and cut the fondant with the same cutters you used for your cookies. Make a few extras just in case. Let the shapes sit for about 15 minutes to become firm.
Lightly paint the cookie surface with corn syrup and then adhere the fondant to the top of the cookie.
Use a detail consistency (Thick Shampoo) Royal Icing to outline your designs making sure that you connect all the areas so that your stain will not run into other areas.
Make your "stain" in little wells of an artists palette or a styrofoam egg carton like me, using 1 Tablespoon Corn Syrup, 1 teaspoon water (or Cake Batter Vodka), and desired coloring.
Mix it, mix it good.
It should be thick enough to stay on a paint brush, but will immediately run when touched on a surface. Using your paint brush, lightly fill sections with desired colors.
These cookies will dry with a shiny, hard, candied effect.

Bada Bing
Badda Boom.
You know you live in the South when you see names like Miss Martha, Earlene, and Skip....
This is Home Girl.
Now go make your own cookies!!!


2 comments:
YAY, I can't wait to try this technique out. Thank you for sharing it in easy to do language. ♥
Interesting...this method uses fondant. Can you describe the taste/texture of the stained sections? Are they hard or chewy or neither? They look fantastic!
Post a Comment